
We had a little adventure with our DLP HD set. The technology basically works likes this: There is a very bright light that shines through a spinning color wheel. The wheel itself has different colors on it. The wheel spins somewhere in the neighborhood of 9000 RPM. After the light passes through the color wheel, it goes through the cool DLP chip. The chip has millions of tiny rotating mirrors on it that let light pass through or not. Each one basically corresponds to a "pixel" on a the screen. The combination of the mirror flipping along with the color that has been let through is synchronized and happens so quickly that you get pictures on the screen that are composed of the right colors.
A couple of weeks ago, I heard this weird "thunk" sound and then the picture went all "vibraty" for lack of a better term. There was a weird buzzing sound coming out of the TV. I turned the TV off and it wouldn't ever turn completely back on. A couple of quick searches on the internet and I found reports of the color wheel bearing going out and having similar "audio" symptoms of buzzing. I ordered the part and then had to wait because it was back ordered. I finally got it today and started my repair.
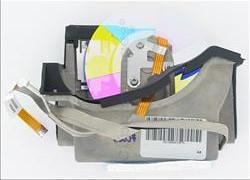
A working one looks like this:
When I pulled mine out, it looked like this:
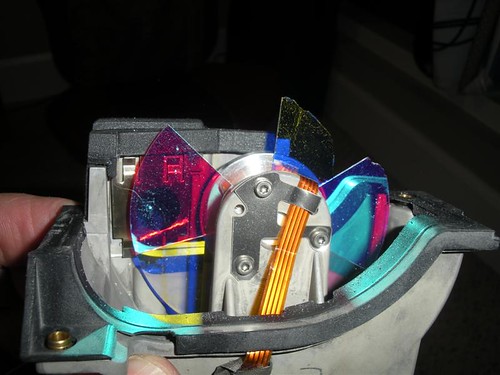
with the shattered remnants looking like this:
Obviously not a bearing problem.
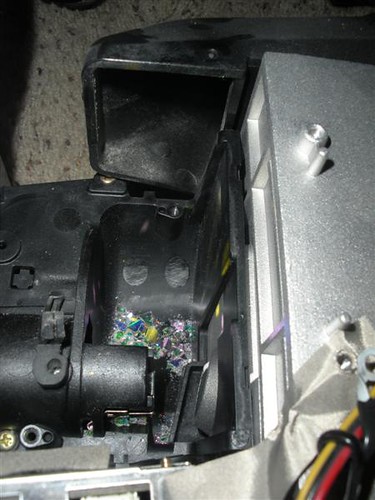
All in all, the repair was pretty quick. I had it done in under an hour. I used this site as a reference but mine was actually much simpler to do then he described. Samsung had rearranged the whole center section of the TV that it slid out on a tray after disconnecting a few connections (easy computer like plug connections). I was then able to unscrew the color wheel from above and swap it out. Of course, I did vacuum out all the little particles in the housing using a can of compressed air to make sure I got them all out into the open where the vacuum could pick them up.

2 comments:
Now that's cool. I love the innards of stuff like that.
I must digg your post therefore more people can see it, very helpful, I had a tough time finding the results searching on the web, thanks.
- Norman
Post a Comment